
Storyboarding
Plan a film as panels and shots, then play them as a timeline.
A project's storyboard is a file of its own, kept beside the project's scenes. It is made of panels grouped into shots, shots into sequences and sequences into acts. It plays and exports like any other work, and the shots can become scenes when you are ready to animate them.
Open the storyboard
The storyboard has a window of its own.
- In the editor, open the scene list at the top of the window. It is the name of your scene with an arrow beside it.
- Choose
Storyboard, which is first in the list. - If the project has no storyboard yet, the Storyboard view offers Start the storyboard. If it has one, it offers Open the storyboard. Press the button.
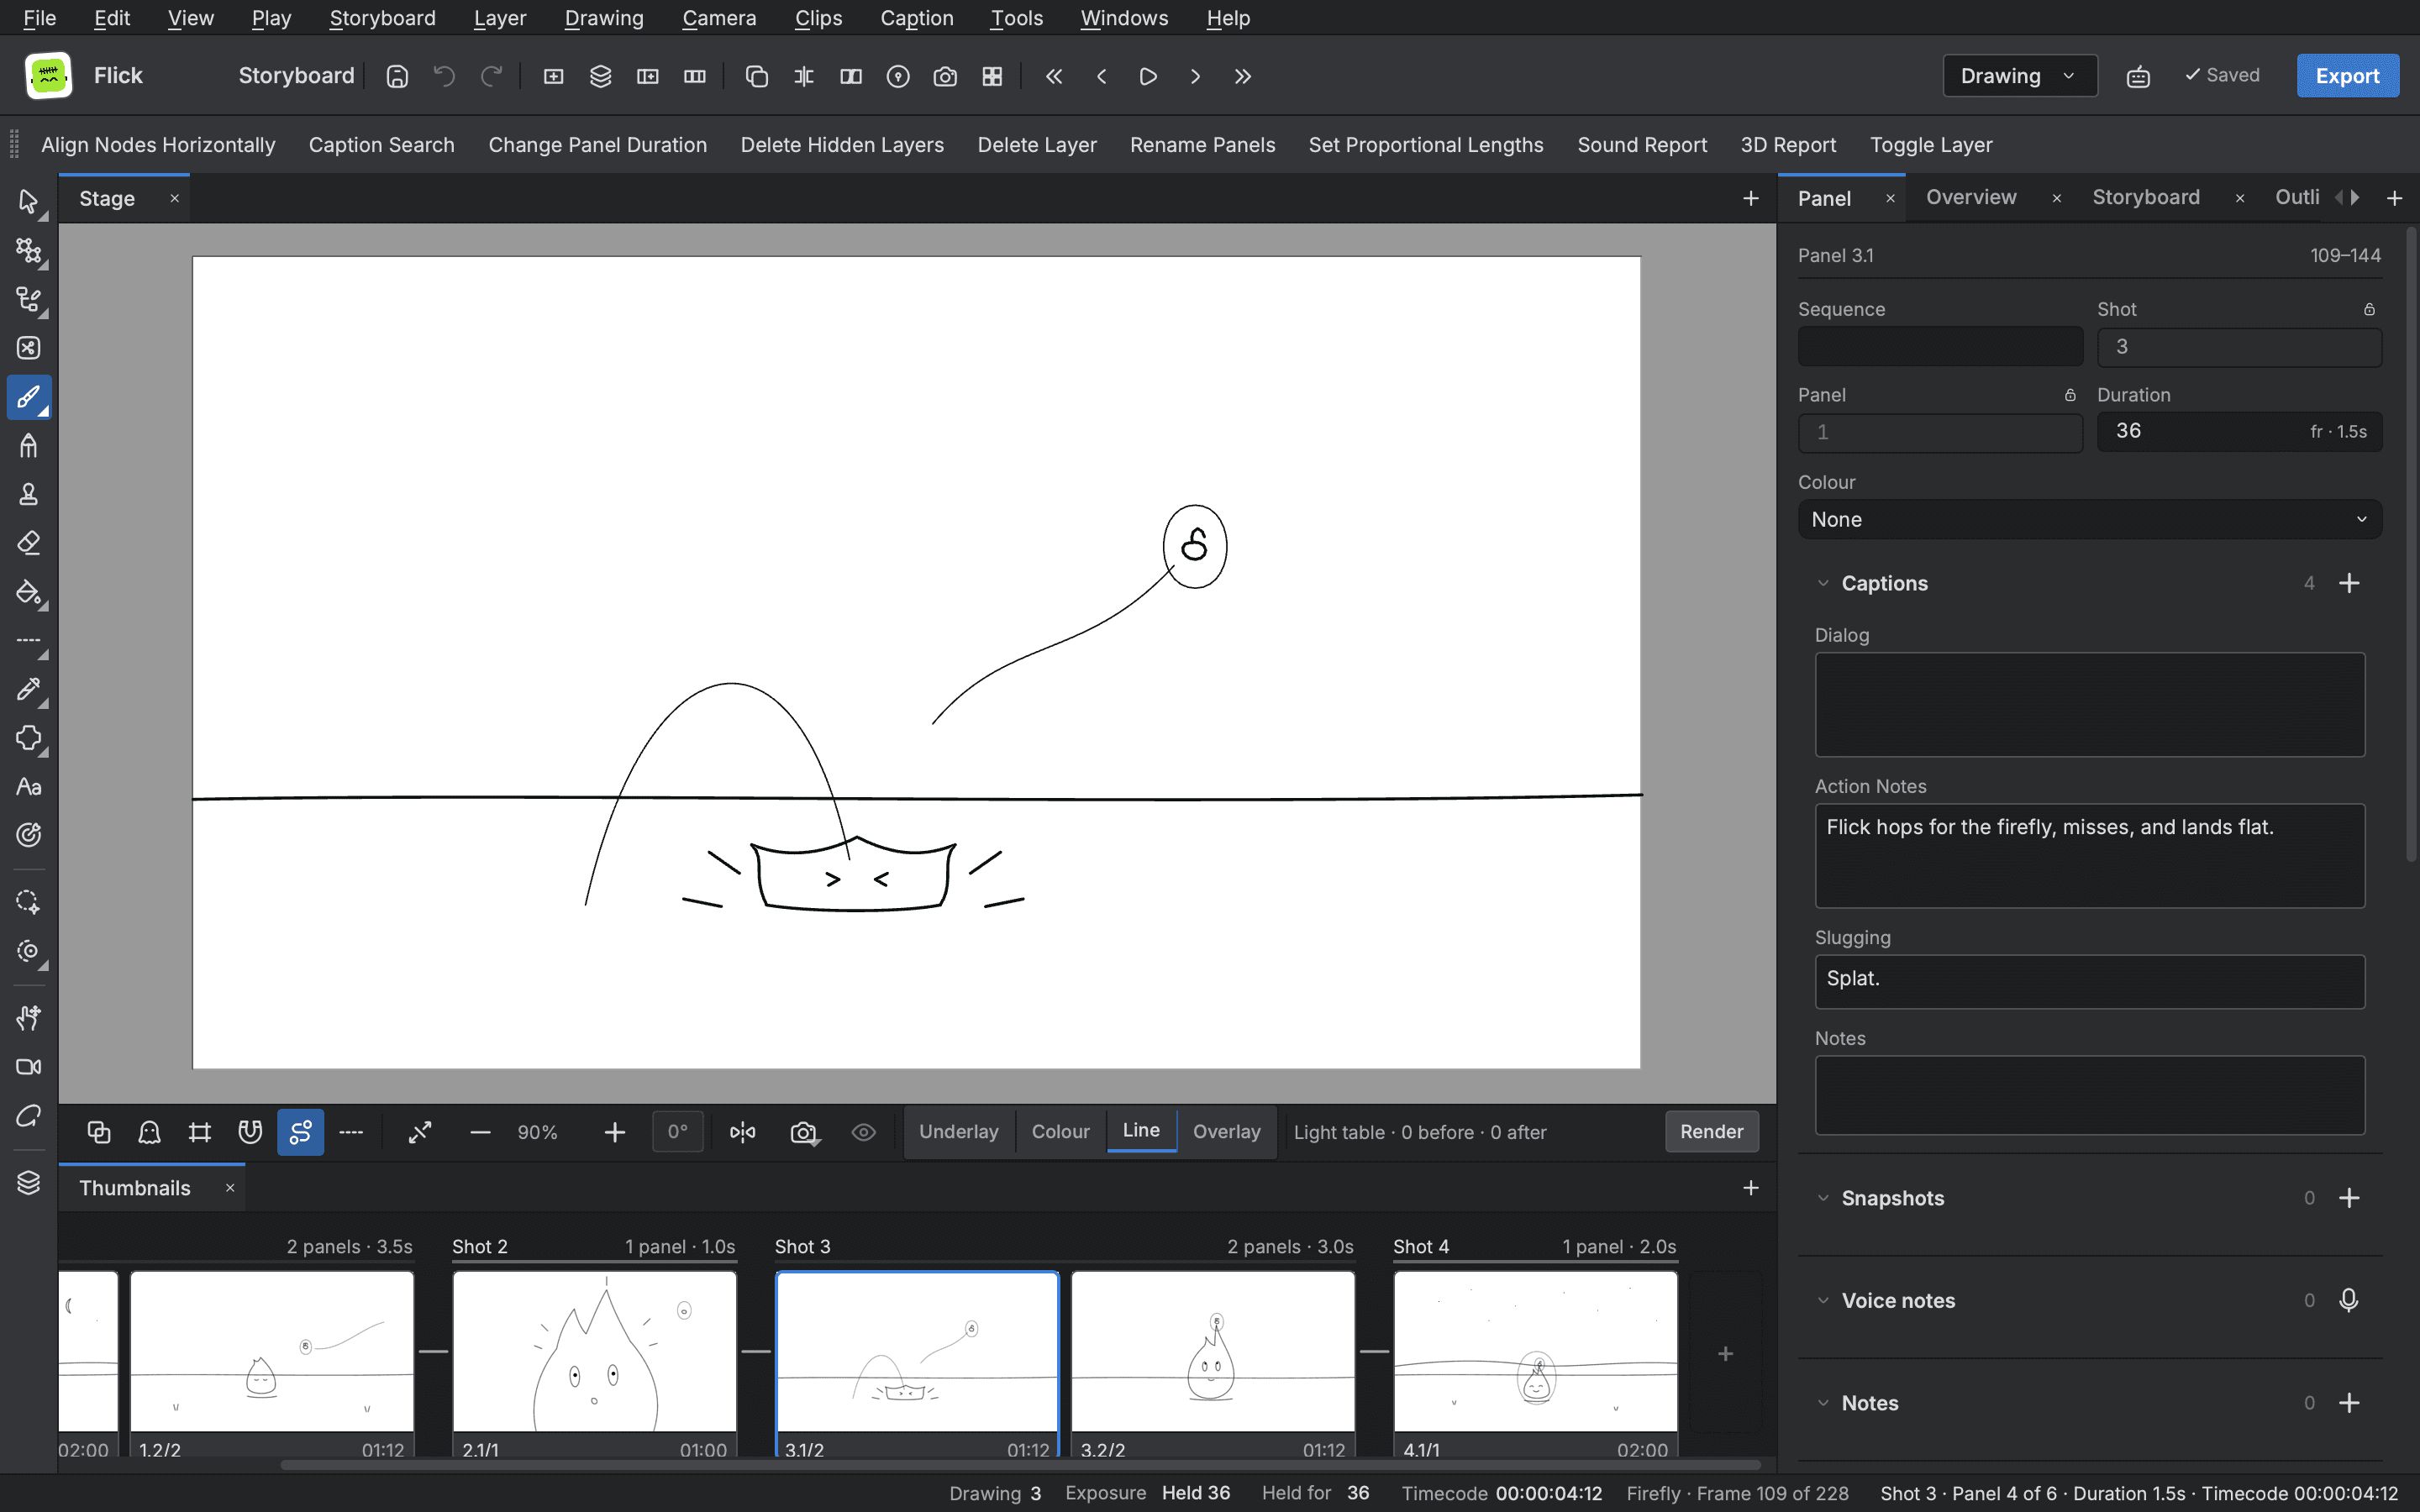
The window has the stage, the tools, the Timeline and playback the editor has, plus views for the board. Its menus include Storyboard, Layer, Camera and Caption. A scene you open from the storyboard window opens in an editor window.
Make panels and shots
A panel is one drawn frame of the board, held for a length of time. A shot is a run of panels.
- Choose
StoryboardthenNewthenNew Panel, or pressPin the storyboard window. The new panel goes after the current one and the playhead moves to it. - Draw in it. Double click a panel in the Thumbnails view to open it for drawing.
- Choose
StoryboardthenNewthenNew Shotto start a new shot.New Panel BeforeandNew Shot Beforeput them ahead of the current one. - Choose
New Sequenceto start a sequence, andStart New Actfor an act.
Other ways to add: Smart Add Panel… makes a panel from the layers you choose, Duplicate Selected Panels copies panels, and Split Panel at Current Frame cuts a panel in two where the playhead is.
In the Thumbnails view, click a panel to select it and move the playhead to it. Shift click selects a range and Command click adds or removes one. Drag a panel or a shot to reorder it, and what is drawn in it goes along.
To rename, use Rename Panel…, Rename Shot… and Rename Sequence…. Lock Shot and Panel Names and Unlock Shot and Panel Names keep the numbers from changing.
The views
The storyboard window shows the board in several views at once. Open any of them from the Window menu.
- Thumbnails: the panels as pictures, in rows by shot, with each shot's length.
- Outline: every act, sequence, shot and panel as a tree with its running time. Click a shot's row to select all the panels in it.
- Jumps: the shots as boxes joined by the jumps between them.
StoryboardthenJumpsraises it. - Panel view: everything about the current panel in one column.
The Panel view folds into sections:
| Section | What it holds |
|---|---|
| Names | The sequence, shot and panel numbers and the length |
| Colour | A colour label for the panel |
| Captions | A box for each caption field of the board |
| Snapshots | Pictures kept at the playhead, one marked primary |
| Voice notes | Spoken notes, recorded with the microphone button |
| Notes | Typed notes with a name and a type |
| Camera | How many frames the camera is keyed on, and quick moves |
| Layers | The panel's layers |
Captions
Each panel carries a box for every caption field of the project, such as action and dialogue. Type in a box and the text is kept on that panel. The Caption menu has the tools for working across the board:
Spell Check…steps through every caption.Check Spelling as You Typeunderlines mistakes as you go.Find Text in Captions…finds and replaces across the whole board.Format Captions…sets bold, italic, underline, colour and size.Swap Text With…exchanges two caption fields.Update Captions from CSV…fills captions from a table in one undo step.
The Add Caption to Storyboard… entry adds a new caption field to the board.
Time it
The board also appears on the Timeline, as Shots and Panels tracks under the ruler, frame for frame. Work on it there.
- Drag the edge of a panel to change its length. With Animatic Editing Mode off, later panels move to make room. With it on, the drag trims the panel and the others stay where they are, and a longer panel grows only into the gap after it. Hold
Commandwhile you drag to get the other behaviour. - While you drag, a badge on the panel shows the length it will have. Edges snap to the playhead and to markers while Snapping is on.
- Choose the Blade and press on a panel to split it where you pressed. Choose Select to go back.
Add Frame to Panel(+) andRemove Frame from Panel(-) lengthen or shorten each selected panel by a frame.Ripple Delete(Shift+Delete) removes panels and closes the gap.Close Gapcloses a gap left by a delete.Lock Shot Durationkeeps a shot's length where it is.Retime Panels…opens a box for timing several panels at once.
Show Duration writes each panel's length on its block, and Collapse Shots folds shots into single blocks. Track sizes run from Mini to Large.
Transitions
A shot comes in by a cut unless you give it a transition.
- Click a panel of the shot.
- Choose
StoryboardthenAdd Transition, or set Comes in by in the Panel view: Cut, Dissolve, Edge Wipe, Clock Wipe or Slide. - Set Over, the number of frames the transition takes. For a wipe or slide you also set its angle and direction.
Change Transition Duration… and Delete Transition are in the same menu.
Play and pitch
The Play menu has Play, Play Backward, Loop, Camera Preview and commands to go to the previous and next panel, shot and sequence, as well as Go to Shot… and Go to Frame….
To present the board, choose Play then Pitch Mode. The window goes full screen. The panels sit in a column left of the shot and their captions sit at the right. Click a panel to go to it. With Auto-play camera moves on, which it is to begin with, it plays the panel once. The bar has a pen, an eraser, Clear marks, a pen size and Exit, so you can draw on the board while you talk through it.
Check it
StoryboardthenCheck Continuity…checks the board for screen direction, the 180 degree line, eyelines and jump cuts. Each problem comes with a fix you can apply.StoryboardthenProduction board…lists every scene of the project with its stage, status, assignee, due day and note, with an Open button for each.
Bring in a script
Storyboard then Import script… takes a screenplay you paste or open and turns it into shots and panels. A row for each kind of paragraph lets you choose which caption field its text goes in. Save as default rules keeps your choices. The import is one undo step, and its report goes to the Message Log.
Make scenes from shots
When the board is ready, choose Storyboard then Create Scenes. Buhayin makes a scene file of each shot beside the storyboard. If you change the board later, the Update from Storyboard button in the Storyboard view brings a scene made this way up to date.
Send it out
In the storyboard window the File menu has an Export submenu. The entries include:
PDF…, which opens the Export storyboard PDF box and lays the board out by a profile you can edit.Movie…, a movie of the project or of each sequence, shot or panel.Bitmap…, a picture of each panel, andLayout…andCurrent Image….CSV…, a table of the board.EDL/AAF/XML…, an edit list for an editing program.Audio…, the board's sound.
File then Import has Images as Shots…, Images as Panels…, Images as Layers…, Sound Clips… and Videos/Images as Clips… for building a board from pictures and sound.
See Exporting for how movie export works.