
The camera and depth
Move the camera, put layers at different depths and use the Perspective view.
The camera decides what is seen. Depth decides how big each layer looks from it: a layer set further back is seen smaller, as on a multiplane camera stand. This page shows you how to look through the camera, key its moves, put layers at different depths and check the result from the side.
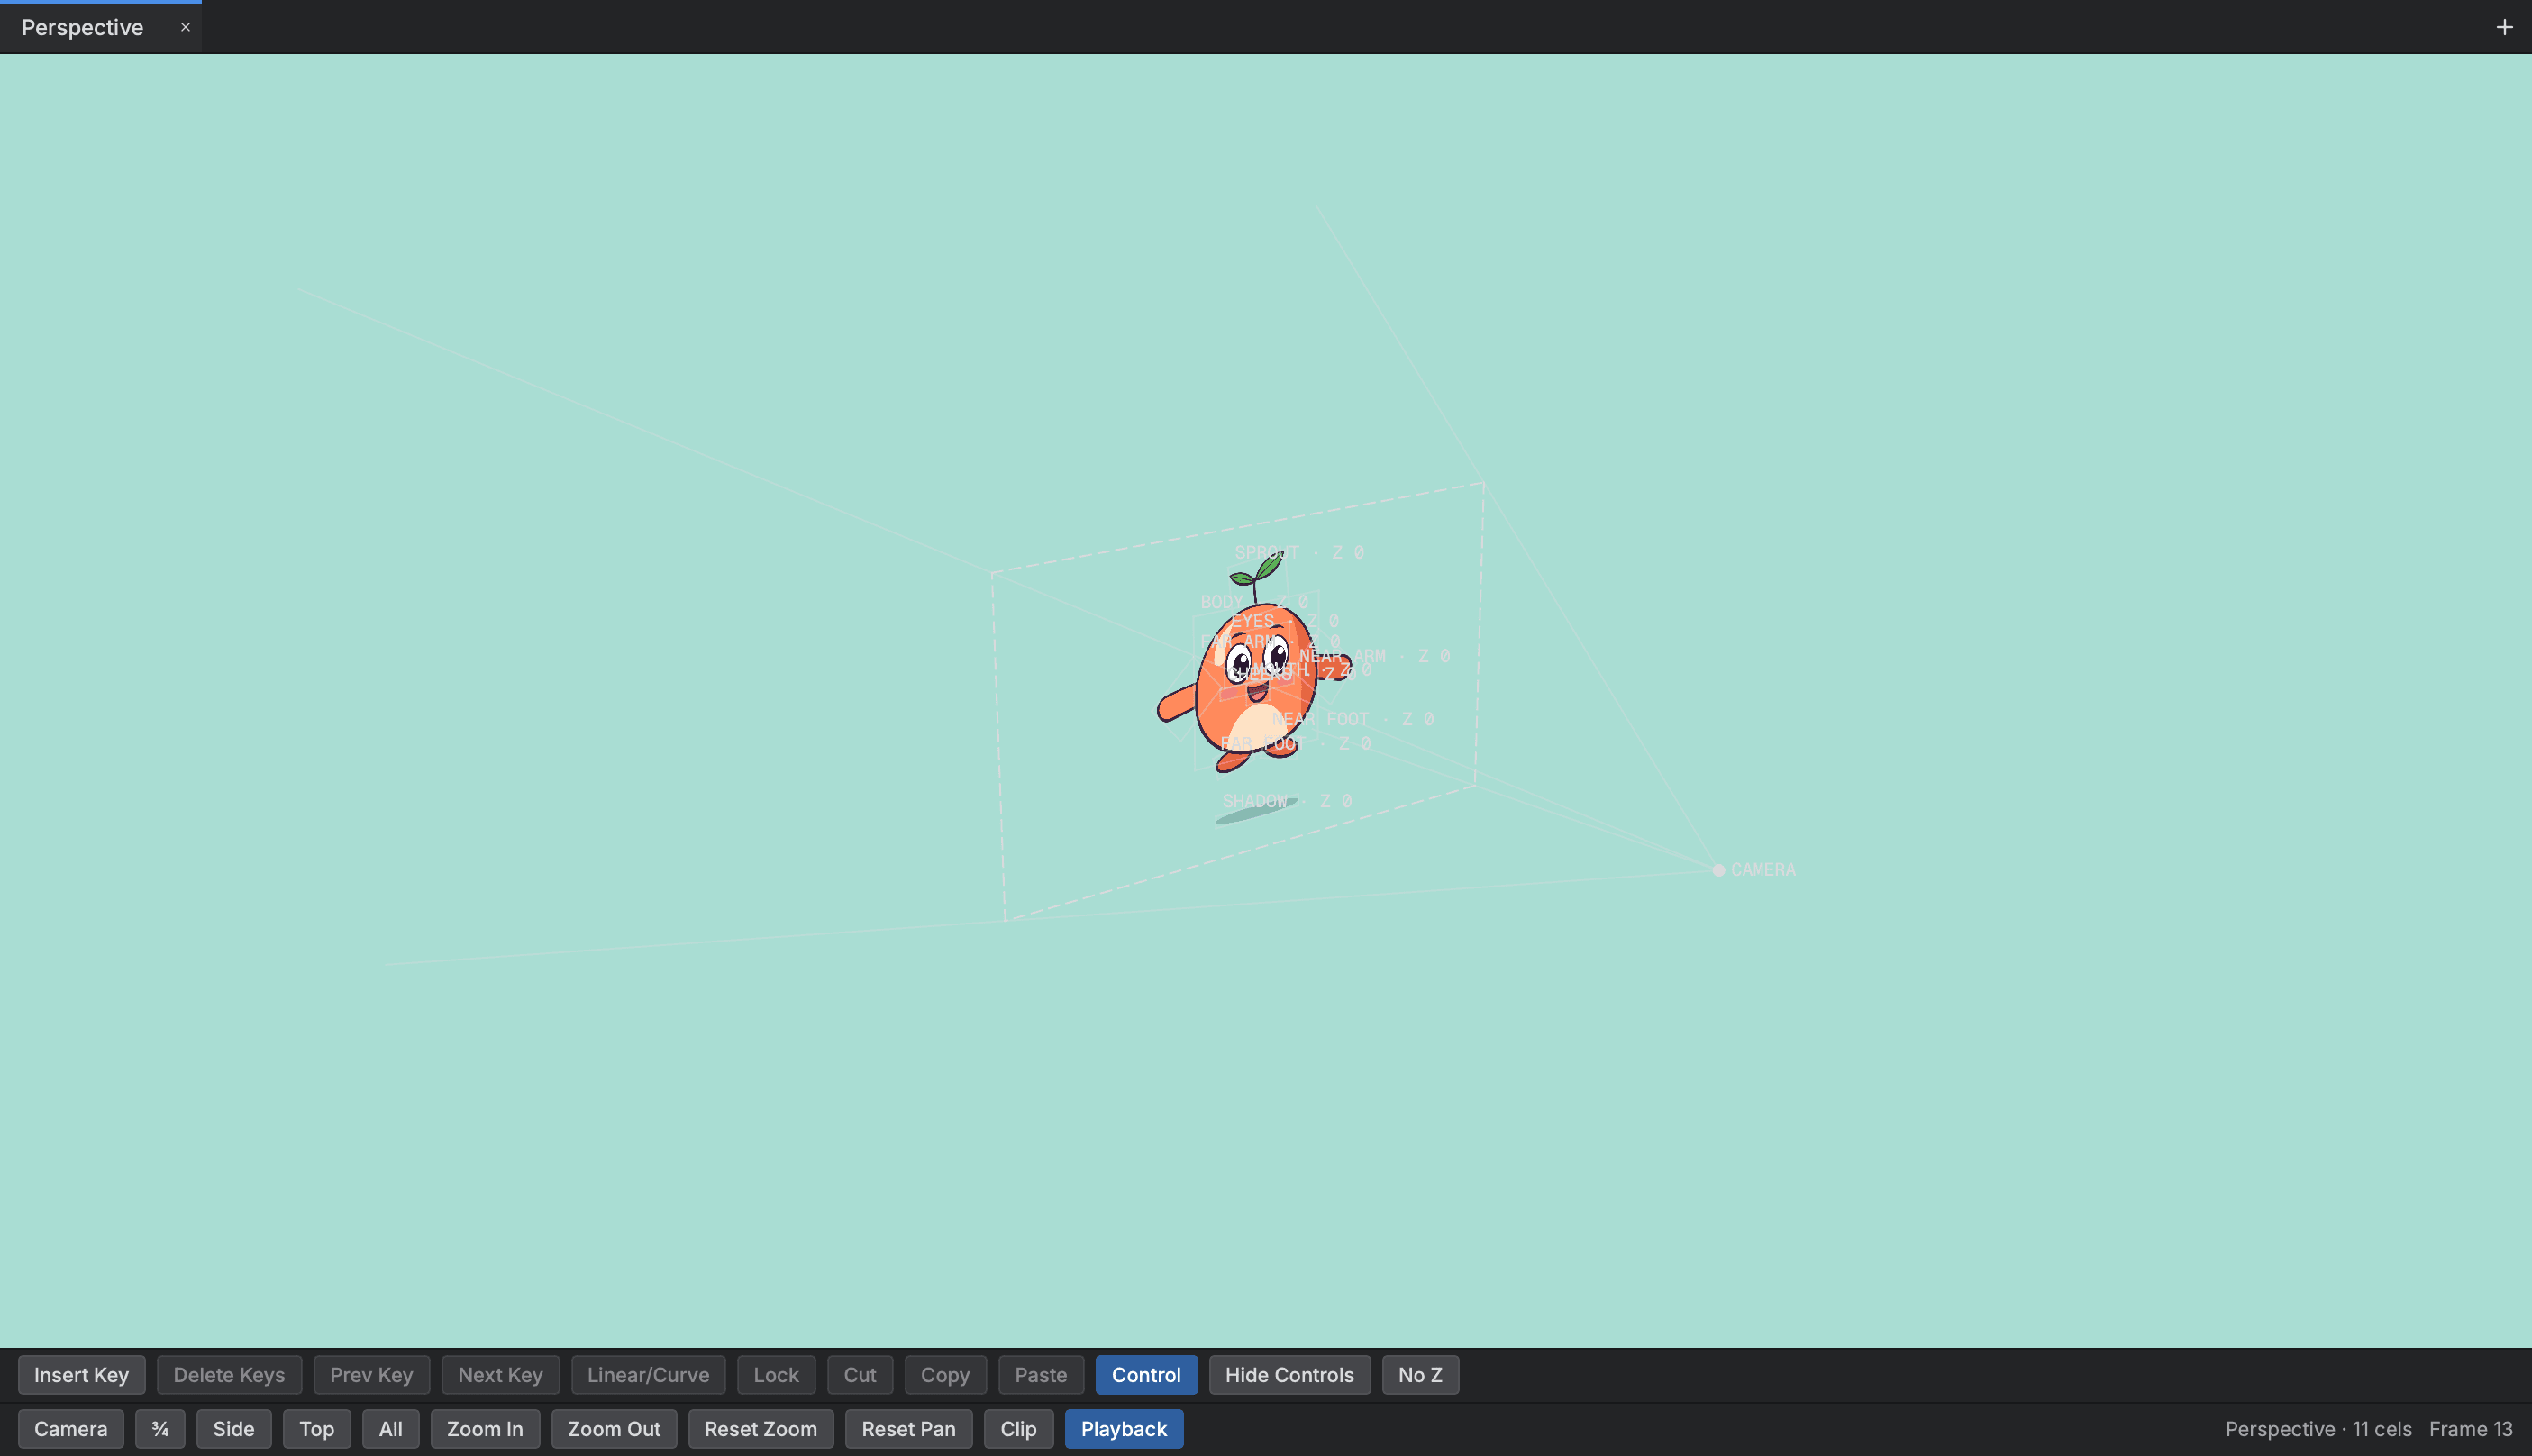
How the camera sees
A scene has a camera that looks at a frame. A layer at depth 0 is seen at its own size. A layer set back from it is seen smaller, scaled about the centre of the frame, and one set further back still is smaller again. A layer nearer than the camera's near plane, or further than its far plane, is not seen at all.
You set depth in two places. The Z depth value for a layer is in Layer Properties, and you can drag a layer along the depth axis in the Perspective view.
Look through the camera
- Open the
Cameraview from the Window menu. This is the stage, showing your frame. - Press Through Camera at the right end of the bar under the stage. You can also choose
ViewthenThrough camera. - The stage now shows the frame as the camera frames it, with everything outside it dimmed. Press the button again to go back to the whole stage.
Other aids in the View menu help with framing: Safe Area draws the safe margins inside the camera frame, and Camera Mask is a switch beside it. In the Camera view, Quick view, Render view, Matte view and Depth view are four ways of showing the frame, with one ticked.
Set the size and the lens
- Choose
ScenethenScene settings…. - In the Scene section, pick a Resolution. Choosing one sets the size, the frame rate and the field of view together.
- In the Camera section, set Projection to Perspective or Orthographic, and Field of view to Horizontal fit, Vertical fit or Custom fov with its angle. Composite there chooses between Stack order and By depth for how layers are laid together.
A camera uses the scene's field of view unless you give that camera one of its own. You can make your own resolution with New Resolution…, which sits under the resolution list in the Scene section.
Add a camera and move it
A new scene starts with one drawing layer, a Composite and a Display, and no camera. To add one:
- Choose
ScenethenAdd camera. - The camera appears as a layer in the Timeline. When a scene has two or more,
ScenethenActive camerachooses the one you see through.
To move the camera, treat it like any other layer.
- Click the camera's row in the Timeline.
- Open
Layer Properties(Shift+E) and type values. The camera has an offset, a pivot, an angle, a field of view, and a near and far plane. - With the Timeline in focus, press
Cmd+Kto set a motion keyframe, or use the key button beside a number in Layer Properties. - Go to another frame and change the value again. The camera moves between its keys.
Set a layer's depth
By number
Select the layer, open Layer Properties and change its Z depth. Key it like any other value if the layer should move toward or away from the camera.
With the Transform or Translate tool in the Camera view, the arrow keys also nudge the current layer, and Option with Up or Down nudges its depth.
By eye in the Perspective view
- Open the
Perspectiveview from the Window menu. - Each drawing on the frame is a flat sheet hung at its depth. Click a sheet to make its layer current.
- Drag the current layer's sheet along the depth axis. It follows your pointer in whole units, and the Timeline, Layer Properties and stage follow while you drag.
- Let go to set the depth as one undo step.
Escapedrops the drag.
The bar along the foot of the view has these buttons:
| Button | What it does |
|---|---|
Camera, ¾, Side, Top, All | Jump the view to a preset angle |
Zoom In, Zoom Out | Zoom |
Reset Zoom, Reset Pan | Put the zoom or the pan back |
Clip | Opens the clipping planes, the near and far limits of the view |
Playback | Off keeps the view on its frame while the scene plays |
No Z | Stops a drag from moving a sheet in depth |
To move around: drag to orbit, drag with Shift or the right button to pan, and use the wheel to move in and out. In the free view, hold W, A, S, D, Q or E to fly, with Shift to go faster, and press F to frame the current layer.
With the Maintain Size tool (Option+6) current, a depth drag also changes the layer's scale and position so the camera still sees it as big as it was and where it was. Use it to push a layer back without it shrinking on screen.
Top and Side
The Top and Side views, also in the Window menu, look straight down or straight across the scene along parallel lines. A sheet shows as a line you can click and drag along the depth axis. They slide with a plain drag and zoom with the wheel.
Plan a path in depth
The spline bar above the Perspective, Top and Side views plans the path a layer's position follows. It is on for a layer that follows a path.
- Go to a frame and press
Insert Keyto add a point locked to that frame. - Use
Prev KeyandNext Keyto move between points. Linear/Curveswitches the points you picked between straight and curved.Locklocks them in time.Cut,CopyandPastework on the points, andDelete Keysremoves them.Controldraws the current layer's path and its points, andHide Controlshides them.
Blur by distance
Depth of field blurs things by how far they are from a focus plane.
- Pick a layer, then choose
ScenethenAdd effectand look for Focus Set and Focus Apply. They set the focus plane and apply the blur by distance from it. - Where planes cross in depth, the composite is laid pixel by pixel at depth, and planes that cross inside a pixel are mixed by their share.
3D models
You can bring a 3D model into a scene and pose it at its own depth.
- Choose
ScenethenImport 3D model…and pick a file. Buhayin reads glTF, FBX, Collada, OBJ, STL, USD and Alembic files. - The model shows in the Camera and Perspective views as a solid.
- Open the
3D Graphview from the Window menu to see the model's parts as a tree. Select parts and use theSubnodesmenu to Enable or Disable them, or right click for Show and Hide Selected Sub-Object Shapes.9expands every part and0collapses them.
Scene then Replace 3D model… swaps a model for another, and Extrude drawing into 3D and Spin drawing into 3D build a solid from a drawing.
In the storyboard window
In the storyboard window the Perspective view also draws the camera as a body you can drag. Click it to make it current, drag to move it, or hold Option to move it along its axis. While it is current, a round knob over its frame turns it and a square knob on the frame's right side widens or narrows its field of view. Each drag is one undo step. See Storyboarding.