
Sound and lip sync
Bring in sound, place clips, see the waveform and match mouths to speech.
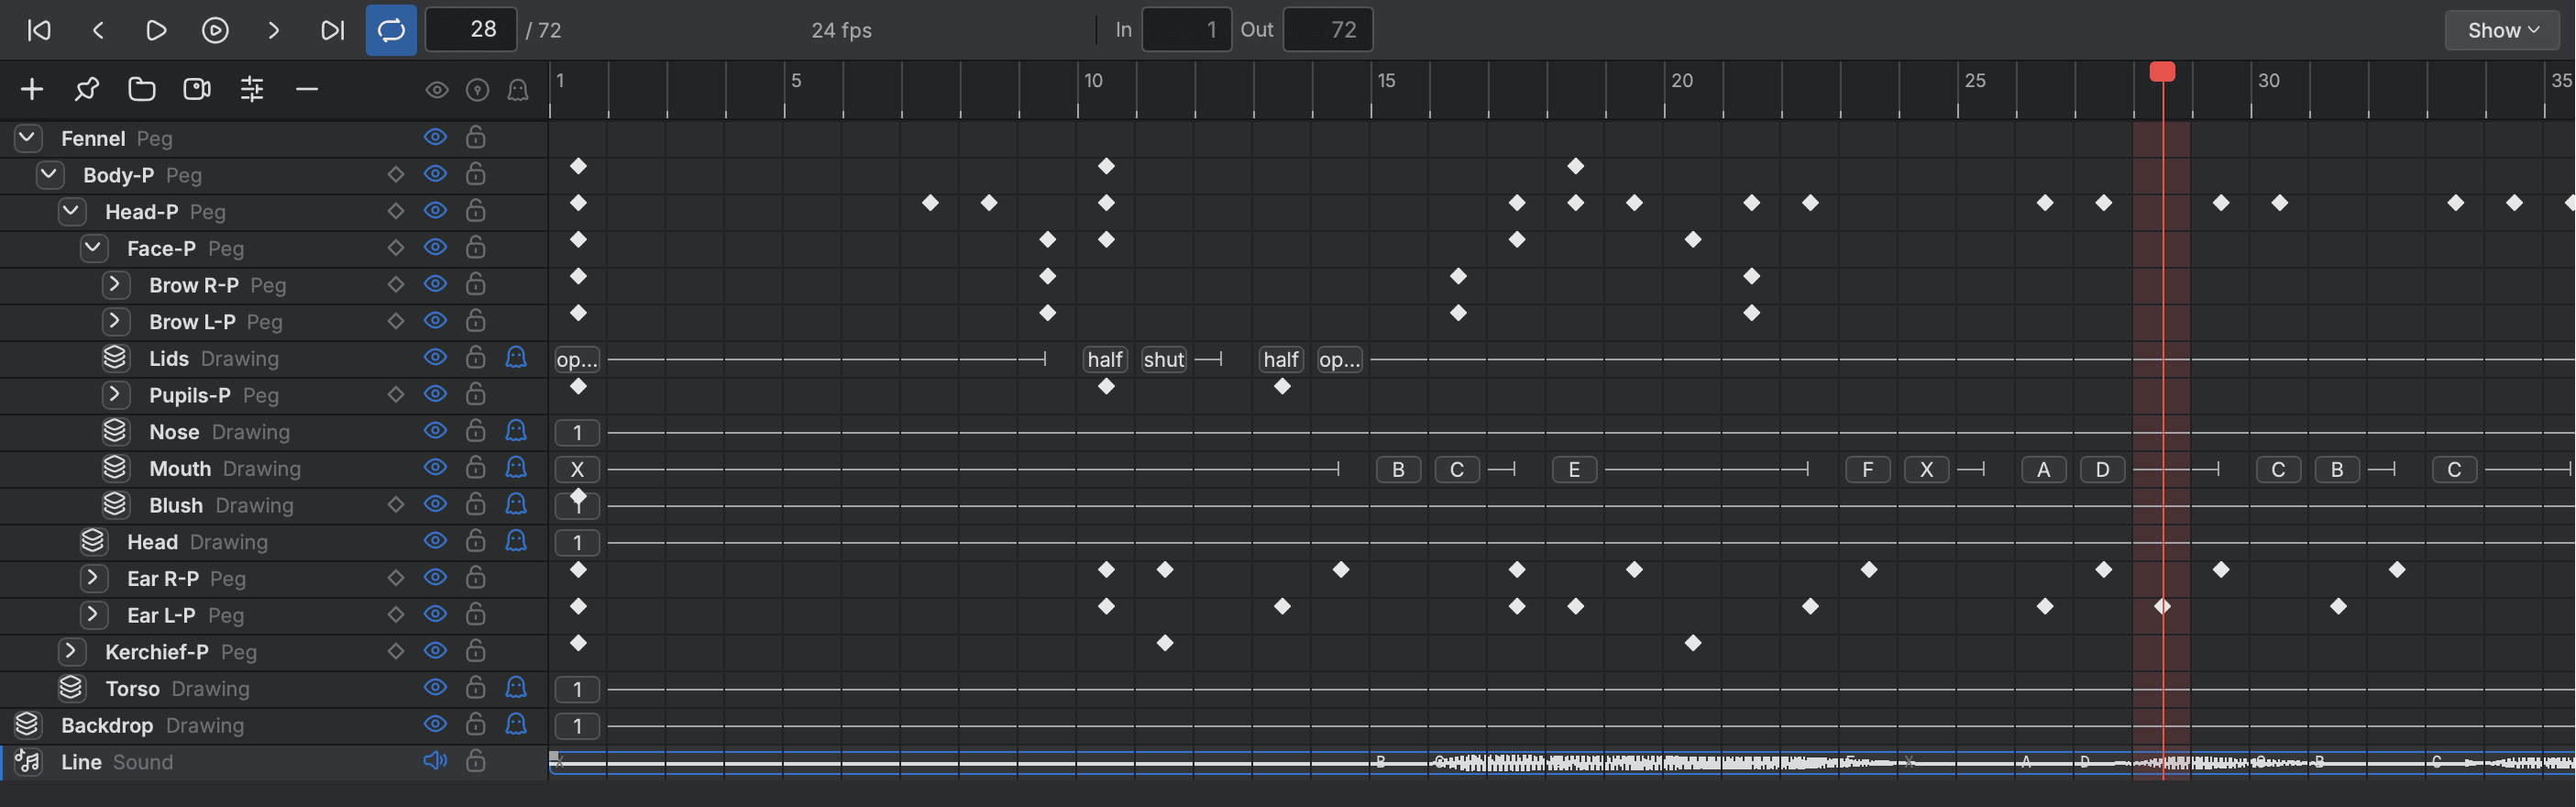
Dialogue, music and effects sit on the Timeline as sound layers, each clip drawn with its waveform, and they play in step with the picture. This page shows you how to bring sound in, place and trim it, hear it while you work, and have Buhayin lay mouth shapes onto your own mouth drawings.
Bring a sound in
Buhayin reads WAV, MP3, AAC (M4A), FLAC and Ogg Vorbis files.
- Choose
ScenethenImport sound…. You can also find it underFilethenImport. - In the Import Sound Clips box, press the button beside Source Sound Clips and pick one or more files.
- Choose a Destination:
New Audio Tracks, orCurrent Audio Trackif a sound layer is current. - Choose a Position:
First FrameorCurrent Frame, which is where the playhead is. - Choose an Import Rule:
Overwrite Existing Sound Clipscuts whatever the new clip lands on, andFill Next Available Framesstops before the next clip it would run into. - Press
OK.
All the files go in as one step, so one Undo takes them all back. Each file goes on a new track of its own when you choose new tracks.
To skip this box next time, tick Set as default and don't show dialog again. Buhayin then asks only for the files and uses your last choices. You can also drop a sound file straight onto the Timeline.
See and hear it
A sound layer shows its clips on a row of its own. Use the Show menu at the right of the Timeline for the sound switches:
| Switch | What it does |
|---|---|
Show Sounds | Shows or hides the sound rows |
Show Sound Waveforms | Draws each clip's loudness on its row |
Enable Sound Scrubbing | Plays the slice of sound under the playhead as you move it |
Solo Mode | Switches solo mode on or off |
The waveforms are kept beside the sound file, so a long sound draws at once the next time you open the project.
Choose Animation then Enable Sound to turn playback of the sound on or off. Press the play button, or Space, and the sound plays with the picture.
The header of a sound row has two buttons:
- Sync makes the track play with the picture.
- Solo puts the row in the solo set, and playing then plays the soloed sound rows alone.
Move and trim clips
- Drag a clip to move it along its row. Drag its edge to trim it.
- Pick several clips together and drag them as a block. You can drag the block onto another sound layer, and the clips land where you let go.
- To split a clip, put the playhead where you want the cut, right click the sound row and choose
Split clip at the playhead.
Watch the level
Open the VU Meters view from the Window menu. It draws a bar for the left channel and one for the right, from minus 90 to 0 decibels: green up to minus 12, amber to minus 3 and red above that. A line on each bar marks where that channel's level stands.
Its menu has Dynamic Peaks and Static Peaks. On Dynamic Peaks the line holds for about a second and a half and then falls. On Static Peaks it stays at its highest point until you choose Reset.
Lip sync
Lip sync is two steps: detect which mouth shape belongs on each frame, then map those shapes onto your own mouth drawings. The shapes are named A, B, C, D, E, F, G and X, where X is the mouth at rest.
Detect
- Click the sound layer's row so it is current.
- Choose
EditthenLip-SyncthenAuto Lip-Sync Detection, or right click the sound row and use theLip-Syncmenu there. It is available once the sound has been read. - Mouth shapes appear on the clip, one for each frame.
If you have a lip sync program installed beside Buhayin or on your computer's path, Buhayin uses it to hear the words. Without one, it estimates the shapes from loudness. Preferences has a Lip sync section where you can point to the program. On a Mac, open Preferences from the Buhayin menu or with Cmd+,.
To change one frame by hand, use Change Mouth Shape To in the same menu and pick a letter.
Map
- Draw a mouth drawing for each shape on a drawing layer, and name each drawing for its shape, such as
A,Band so on. A symbol layer works too, with the shape shown by one of the symbol's frames. - With the sound layer current, choose
EditthenLip-SyncthenMap Lip-Sync…. It is available once the clip has lip sync and the scene has a drawing or symbol layer to map to. - In the Lip-Sync Mapping box, choose the drawing layer to map onto. Each shape A to G and X shows a picture of the mouth and the name of the drawing it will use. Buhayin fills the name from the drawing named for that shape.
- For a symbol layer, pick the symbol and type the frame each shape shows.
- Press
Map. It waits until every name you typed is one the layer has. Buhayin then lays the matching drawing on each frame of the layer.
In the storyboard window
The storyboard window adds a few sound tools of its own. Its Clips and Tracks bar has Record Sound, which records from the microphone and places the take on a sound track from the playhead. It also has Overwrite Clips, so a drag goes past the clip beside it and overwrites what it lands on, and Show Volume, which draws the volume envelope and the fade handles. A clip's speed and gain have their own boxes there, and its effects, such as echo and reverb, are listed in an Effects view. See Storyboarding.