
Rigging a cut out character
Pegs, pivots, hierarchy, drawing substitution and deformers.
A cut out character is drawn once, part by part, and then posed again and again. Each part turns about its own joint, and parts hang from one another so that moving an upper arm carries the forearm and the hand with it. You do not redraw the character for each pose. This page shows how to build one.
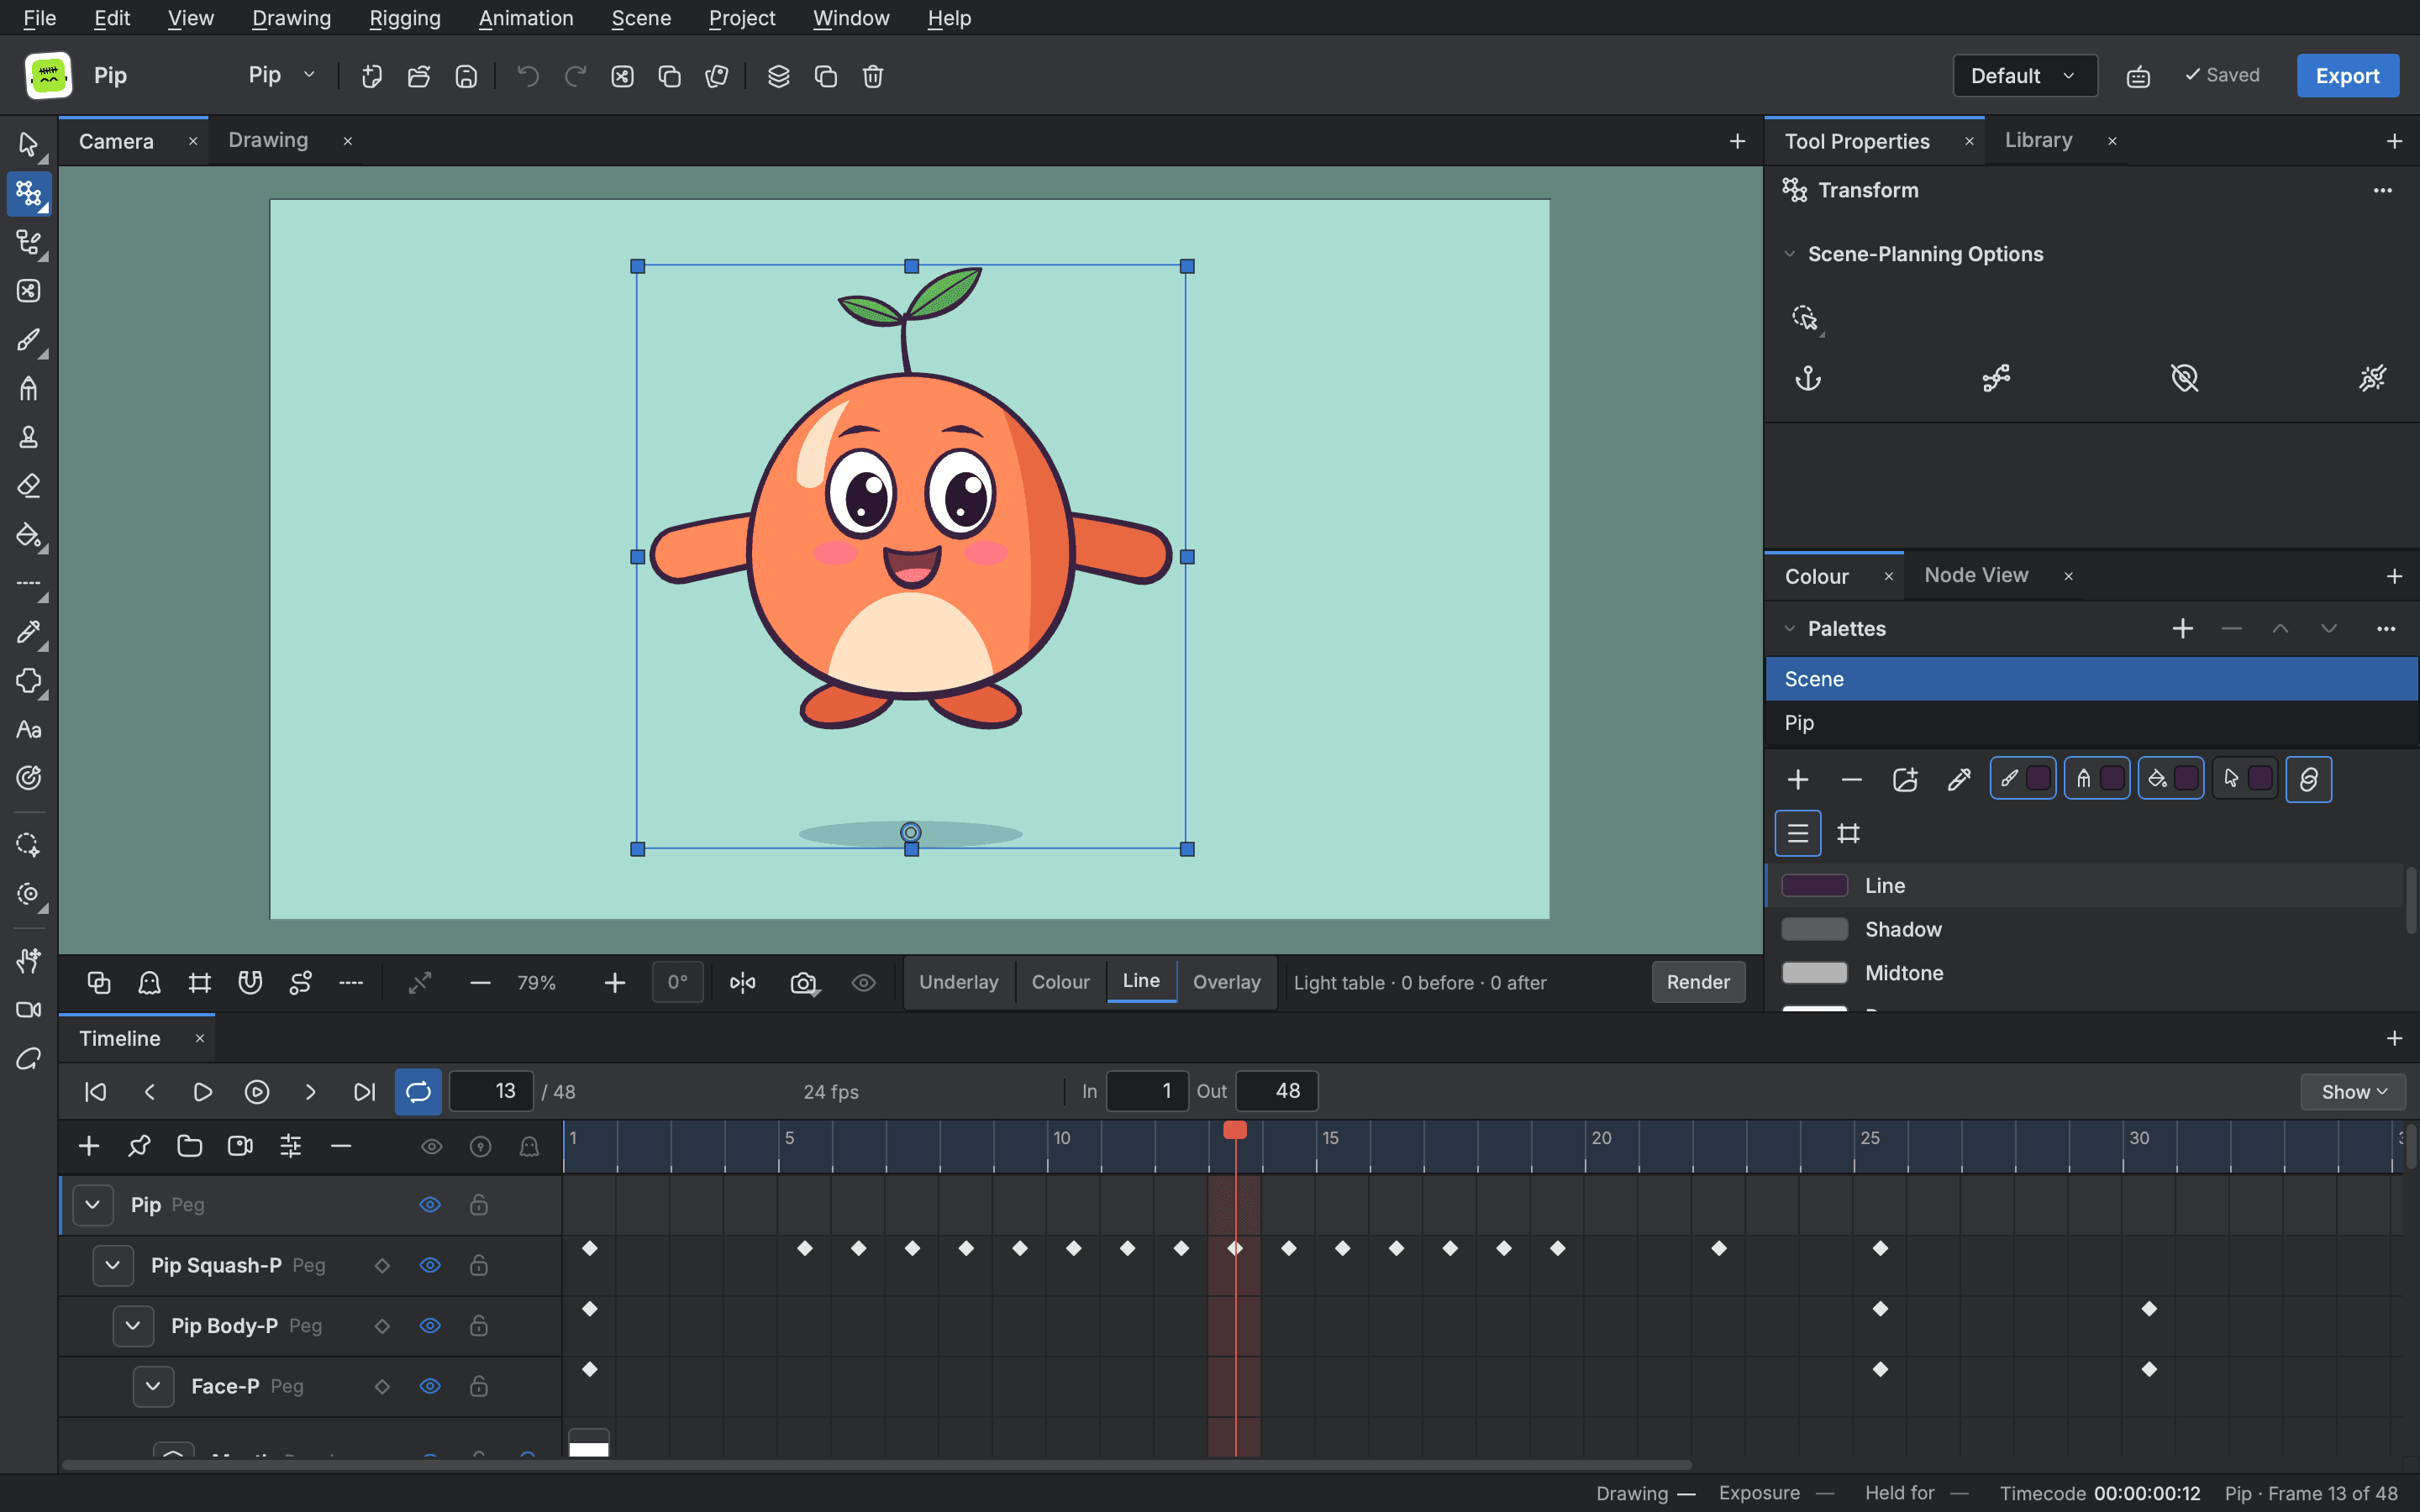
What a rig is made of
A rig has four kinds of piece.
- Drawing layers, one for each part that moves on its own: a head, a body, an upper arm, a forearm, a hand.
- Pegs, which move, turn and scale whatever hangs from them. A peg draws nothing.
- A hierarchy, which says what hangs from what. Turn the shoulder peg and everything under it turns too.
- Deformers, which bend a part instead of turning it whole, for a squashed body or a curved arm.
Moving a part means keying its peg, not the drawing. Parts that change shape, such as a hand or a mouth, swap drawings instead of bending.
Plan the parts
Before you draw, decide three things.
- Which parts move on their own. A limb is several parts. An arm is a shoulder, an upper arm, a forearm and a hand. A head may be a skull, a jaw, two eyes, a mouth.
- Where each part turns. Neck, shoulder, elbow, wrist, waist, hip, knee, ankle.
- Which parts change shape. Hands and mouths usually do. Draw a few drawings for each.
Draw each part on its own layer
- Choose
Scene > Add layer(Cmd+R) to make a drawing layer for the first part. - Double click the layer's name in the Timeline and type a name you will recognise, such as
Near Forearm. - Draw the whole part on that layer, as if its neighbour were not there. Let each end that meets a joint run on past the joint, under the part it joins, far enough that the part can turn without a gap showing.
- Repeat for every part.
Draw each part completely, not cut off at the joint. Where two parts meet, draw both round ends as one circle about the joint, so the joint stays smooth as it turns.
Add pegs and hang the parts
A peg is a row in the Timeline with no drawing.
- Choose
Scene > Add peg(Cmd+P). A peg row is made. - Name it for what it carries, such as
Near Forearm-P. - Drag the part's drawing row onto the peg row. Dropping a layer on a peg or group row makes the peg its parent, and the layer moves in under it.
To put a new peg above layers that already exist, select them and choose Scene > Parent peg, or press Shift+P in the Timeline. Insert Parent Peg makes a peg that is their parent.
To hang one peg from another, drop its row on the other peg's row the same way. Build from the outside in: a hand peg under the forearm peg, the forearm peg under the upper arm peg, the upper arm peg under a shoulder peg, and so on up to a peg for the whole character.
The Timeline shows the result as an indented tree. You can fold a peg's row to hide what hangs under it.
Scene > Group layer and Group selection (Cmd+G) put layers in a group, which is useful for keeping a character's parts together.
Check the tree
Select a peg row and turn it with the Rotate tool (Option+3) in the Camera view. The part and everything under it should turn together. Undo with Cmd+Z. If a part stays behind, it is hanging from the wrong peg.
Set each pivot
A peg turns about its pivot. Put the pivot at the joint, before you make any keys.
- Select the peg's row.
- Choose the
Transformtool (Shift+T). The peg's box appears on the stage, with its pivot drawn as three circles. - Drag the pivot to the joint.
If the pivot will not move, open Edit > Preferences…, go to the Camera view page and check that Allow Temporary Pivot dragging in camera view is on.
The Drawing Pivot tool (Shift+P on the stage) sets a drawing's own pivot.
Turn the peg once more to check that the part swings about the joint. Move the pivot again until it does.
Swap drawings for hands and mouths
Some parts change shape. A hand opens and closes, a mouth makes the shapes of speech. Draw each shape as its own drawing on one layer, then choose which one shows on each frame. This is drawing substitution. It swaps the drawing a cell shows without drawing anything new.
- Select the cell on the part's layer.
- Open
Drawing Substitutionsfrom the Window menu. It shows the layer's drawings as thumbnails. - Click the drawing you want. The cell shows it.
You can also use Drawing > Substitute Layer Previous and Substitute Layer Next, and the cell menu's Substitute Drawing Previous and Substitute Drawing Next, to step through the drawings. The first tile in the Drawing Substitutions view is No Exposure, which empties the cell.
Deformers
A peg turns a part whole. A deformer bends it. Use one on an arm that should curve or a body that should squash.
The Rigging menu is where they start. Rigging > Rigging Tool takes the Bone tool (Shift+I).
- Envelope.
Rigging > Create Envelope…wraps a drawing in a loop of curves in one step. Move the curves with keys to squash, bulge or bend the part, like a sleeve or a cheek. - Bone. With the Bone tool, the first drag on a drawing sets where a bone starts, and the next drag draws from it. The drawing bends along the bones.
- Quadmap. The
Add quadmapcommand lets you pull the four corners of a drawing to a new four sided shape, for perspective or squash. - Others. The Bone tool's Deformer select also offers Free Form points and Shape Aware bones and cages.
Rigging > Insert Deformation Above and Insert Deformation Under add a deformation to the layer you have selected. Rigging > Enable Deformations switches them on and off, and Setup Mode in the Bone tool's panel lets you place joints without moving the drawing.
Keep it tidy
- Name every layer and peg for what it is, and the near side apart from the far side.
- Keep one peg at the top of the whole character, so you can move the character as a unit and place it on the stage.
- Set every pivot before you make the first key.
- Reuse drawings. A far arm drawn like the near one can be a clone of its layer, made with Clone layer in the row's right click menu, which shows the same drawings on its own timing.
Once the rig turns about its joints without gaps, go to Animating a rig to pose it.